Are you ready to transform your garden without emptying your wallet? Building a gravel garden path is not only an affordable DIY project but also a delightful way to enhance the beauty and functionality of your outdoor space.
What You Will Learn
- Gravel paths are a cost-effective solution that can significantly boost your home's curb appeal.
- Creating a budget involves considering materials, tools, and potential labor costs to ensure a successful project.
- Utilizing local gravel suppliers and recycled materials can help you save money while enhancing your garden's aesthetics.
- Incorporating creative design elements like curves and plant borders can elevate the visual appeal of your gravel path.
- Mixing gravel with natural stones and mulch can create beautiful contrasts and improve the overall texture of your path.
- Selecting the right edging materials, such as natural stone or wood, can enhance both the function and look of your gravel path.
- Choosing budget-friendly materials like pea gravel and crushed stone will allow you to stay within budget while achieving a stunning look.
- Visualizing inspiration through before-and-after transformations can ignite your creativity and guide your design choices.
Key Benefits of a Gravel Garden Path
Building a gravel garden path offers numerous advantages. The following visual highlights the primary benefits:
Affordability
Gravel is generally less expensive than other hardscape materials, making it a budget-friendly option for homeowners.
Quick Installation
Most gravel paths can be completed in a weekend, allowing for immediate enjoyment of your outdoor space.
Low Maintenance
Gravel paths require minimal upkeep compared to paved options, saving you time and effort in maintenance.
Aesthetic Appeal
Gravel paths can enhance the overall look of your garden, creating a natural flow that invites exploration.
Essential Guide to Building a Gravel Garden Path on a Budget
Building a gravel garden path can be an exciting and budget-friendly project. Not only does it enhance the look of your landscape, but it also offers practical benefits like easy maintenance and improved drainage. Let me walk you through the essential elements of crafting a stunning gravel path that won’t break the bank! For more ideas on how to improve your outdoor space, explore our guide on enhancing curb appeal with DIY projects.
Understanding the Appeal of a Gravel Garden Path
Choosing a *gravel garden path* is a fantastic way to elevate your outdoor space! Gravel paths are versatile, allowing for various designs that can suit any garden style. Plus, they're a cost-effective solution that can make a big impact on your home's curb appeal.
There are several key benefits to consider:
- Affordability: Gravel is generally less expensive than other hardscape materials.
- Quick installation: You can often complete a gravel path in a weekend!
- Low maintenance: Gravel paths require minimal upkeep compared to paved options.
As a garden enthusiast myself, I love how a gravel path can create a natural flow through the garden, inviting guests to stroll along and appreciate the beauty of each plant. Imagine the soft crunch of gravel underfoot as you wander through your vibrant landscape!
Identifying Your Budget for a Gravel Path Project
Before diving into the project, it's crucial to assess your budget. Take a moment to outline all potential costs associated with your gravel path, including materials, tools, and any additional features you might want to include.
Here’s a quick checklist to help you identify your budget:
- Materials: Gravel, landscape fabric, edging, etc.
- Tools: Shovels, rakes, wheelbarrow, if you don’t have them already.
- Labor: Will you be doing it yourself or hiring help?
Having a clear understanding of your budget will allow you to make informed decisions as you go. Remember, it’s all about creating something beautiful without overspending. With a little planning, you can achieve fantastic results!
Exploring Cost-effective Landscaping Solutions
Now that you have a budget in mind, let's explore some cost-effective landscaping solutions! There are various materials and methods available that can help you create an attractive gravel path while keeping costs low.
Consider these budget-friendly options:
- Local gravel suppliers: Check for nearby suppliers that offer competitive prices.
- Recycled materials: Look for reclaimed stone or gravel from local construction sites.
- DIY edging: Use stones or natural wood from your yard instead of buying new edging materials.
By getting creative with your choices, you can make your gravel path not only budget-friendly but also uniquely personalized. I often find that the best projects come from using what you have on hand—let your garden guide you! For more inspiration on transforming your outdoor space, consider enhancing curb appeal with trees.
Quick Summary
Here's a brief recap of the key points discussed so far:
- Gravel paths are an affordable and visually appealing option for enhancing your garden.
- Budgeting is crucial; consider all potential costs including materials and tools.
- Creative landscaping solutions, such as using recycled materials and DIY edging, can help you save money.
- Integrating natural stones and mulch can add texture and beauty to your gravel path.
Engaging Design Ideas for a Budget Gravel Path
Creating an inviting gravel path can be a fun and rewarding project! At Garden Plan Guide, I love sharing creative ideas that enhance the look of your garden while keeping costs low. Incorporating aesthetic elements into your path can elevate the entire outdoor space without breaking the bank.
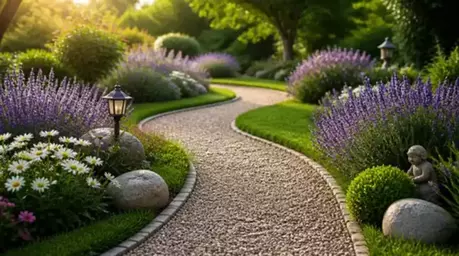
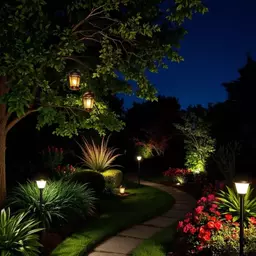
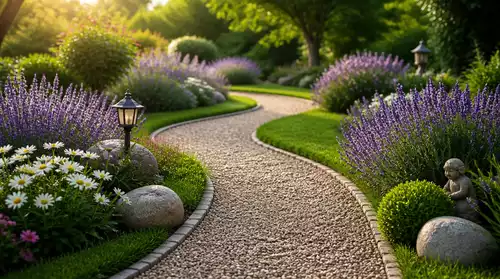
One great way to achieve this is by playing with different layouts. Consider using curves instead of straight lines to create a more organic feel. Adding borders made from stones, bricks, or even wood can also give your path a polished look. It’s these small touches that make a big difference!
- Experiment with different shapes—try a winding path!
- Add borders of natural stone or recycled materials.
- Use plants along the edges to soften the appearance.
Pathway Design: Integrating Natural Stone and Mulch
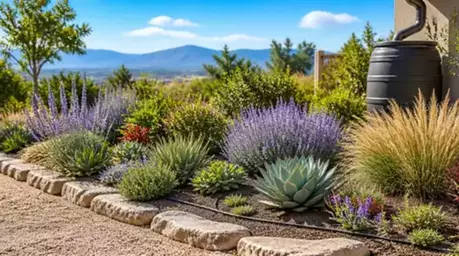
Integrating natural stones and mulch with your gravel can create stunning visual contrast. Imagine a path where smooth gravel meets rustic stones, surrounded by a layer of rich mulch! This not only adds beauty but also texture, making your garden feel more inviting. For more ideas on garden designs, check out our guide on a beginner's guide to garden layout.
Here are some tips for blending these materials effectively:
- Use large flat stones as stepping stones throughout the gravel.
- Fill gaps with mulch to prevent weeds and add color.
- Choose stones that complement the color of your gravel for cohesion.
By mixing these elements, you create a path that feels both structured and natural, enhancing your garden's overall charm.
Visual Inspirations: Before and After Transformations
Sometimes, seeing is believing! At Garden Plan Guide, I love sharing before and after transformations that showcase the potential of a gravel path. These examples can spark your imagination and help you visualize your own project.
Consider checking out local gardening groups or online forums for stunning visuals. Here are a few ideas to inspire your design:
- Brightly colored gravel paired with lush greenery.
- A path lined with flowers, creating a vibrant border.
- Using pebbles of varying sizes for a textured look.
Remember, every small change can have a huge impact! Don’t hesitate to experiment with different ideas until you find the perfect look for your garden.
Frequently Asked Questions About Budget Gravel Paths
What is the ideal depth for a gravel path?
When building a gravel path, the ideal depth typically ranges from 3 to 4 inches. This depth provides enough coverage for stability while allowing for proper drainage. Ensure that the area is excavated to this depth before laying the gravel to promote longevity.
How do I choose the right edging for my gravel path?
Choosing the right edging can enhance both the function and aesthetics of your path. We recommend considering these materials:
- Natural stone for a rustic appeal.
- Wooden timbers for a softer touch.
- Metal edging for a sleek and modern look.
What are some budget-friendly materials for pathway construction?
Creating a beautiful gravel path doesn’t have to be expensive! Here are some cost-effective materials to consider:
- Pea gravel: Affordable and easy to find.
- Crushed stone: Offers stability and comes in various colors.
- Bark mulch: Great for natural borders and weed control.
Can I really install a gravel path in a weekend?
Yes, most gravel paths can be completed in a weekend, especially if you have a clear plan and the necessary tools. The quick installation is one of the key benefits, allowing for immediate enjoyment of your outdoor space. Larger or more complex designs may take a bit longer, but simple paths are definitely a weekend project.
How do gravel paths improve drainage?
Gravel paths improve drainage by allowing water to percolate through the stones and into the soil below, rather than pooling on the surface. This helps prevent water runoff and can be particularly beneficial in areas prone to puddling or erosion.
Final Thoughts on Your Gravel Garden Path Project
Summary of Key Steps and Considerations
To recap, building a budget-friendly gravel path involves several key steps. Start with planning your design, assess your materials, and don’t forget to incorporate creative elements. Remember, a little planning can go a long way in ensuring the success of your project! For more ideas on how to enhance your outdoor space, read about various garden path ideas and materials.
Taking Action: Start Your Gravel Path Project Today
Now that you have the insights and inspiration needed, it’s time to take action! Embrace the DIY spirit and start your gravel path project today. At Garden Plan Guide, I believe in your ability to transform your outdoor space into a beautiful haven. Let’s get to work!
Recap of Key Points
Here is a quick recap of the important points discussed in the article:
- Benefits of Gravel Paths: Affordable, quick to install, and low maintenance.
- Budget Planning: Assess costs for materials, tools, and labor before starting.
- Cost-effective Solutions: Use local suppliers, recycled materials, and DIY edging for savings.
- Design Ideas: Play with curves, add borders, and integrate plants for visual interest.
- Material Integration: Combine gravel with natural stones and mulch for texture and beauty.
- Visual Inspirations: Explore before-and-after transformations to spark creativity.
- Construction Tips: Aim for a depth of 3 to 4 inches for stability and drainage.